How to Choose a Telescope

Buying your first telescope can quickly become a daunting task when faced with so many choices and unfamiliar terms. With everything from cheap department store telescopes to computerized models and specialized APO refractors, how do you choose something you'll be able to enjoy for years without spending a fortune?
If you are like me, when it comes to buying something like a telescope, you want to do your research to make sure you purchase something you'll be happy with. When I first got started in astronomy, I spent several months researching what telescope to buy, and I really didn't find most of the "how to choose your first telescope" articles out there all that helpful. Hopefully this article simplifies the process a bit for you.
Some questions you want to consider when shopping for your first telescope:
- How far will you need to move the telescope to setup and use it?
- What do you want to look at? The moon, planets, bright nebula, double-stars, galaxies, clusters?
- How much do you want to spend?
- Do you want to do visual observing or astrophotography?
The sections below should help you think through some of those questions and narrow down your choices.
Price
The adage "you get what you pay for" has an interesting application with telescopes. It isn't a linear value curve; rather it tends to be more of a bell shape. Spend too little, and you wind up with something like the red Tasco telescope I got as a kid that was really only good for looking at the moon and taking up a dusty corner of the garage. At the same time, you don't need to spend a fortune to get a telescope that will bring you years of enjoyment.

Just keep in mind that you are buying a precision optical instrument. Quality convex lenses and concave mirrors are difficult to make. So when you see a shiny $100 telescope with a whole set of eyepieces and a tripod, you can be pretty sure there were a lot of sacrifices made that will leave you disappointed with the view you get through it. At the same time, you don't need to spend thousands on professional quality gear, unless of course you want to start hunting for undiscovered asteroids.
So how much should you spend? That’s a question you need to answer for yourself based on what you can spend and how much enjoyment you expect to get out of observing the universe. In general, expect to spend $150-$300 at the bottom end for a quality instrument, and up to about $2000+ for a large aperture computerized scope. If your interest is astrophotography, you can find good options across that range, depending on what you want to image. More on that later.
Types of Telescopes
Here's a helpful analogy: Think of buying a telescope like buying your mode of transportation to the cosmos. That cheap department store telescope that also comes bundled with a microscope? Think of that as being like a little Razor scooter: It won't take you on the freeway, it’s more than a little shaky, and will probably fall apart after a few weeks.
Taking a step up, you have the basic refractor and newtonian scopes on manual altitude-azimuth (alt-az) or equatorial mounts in the $100-$300 range. These are like bicycles: You can go a lot further than a Razor scooter, but you still can't go down the freeway. Incidentally, anything with a computerized/motorized mount in the $100-300 price range is likely going to have relatively poor optics, so don’t be tempted. These scopes may seem like a bargain at first, but chances are they'll only get used a couple of times before going into the basement.
Once we get past the cruft, there are four different types of telescopes of note for serious beginner and intermediate astronomers: Refractors, Newtonians, Dobsonians, and Schmidt-Cassegrains. These telescopes are like stepping up to internal combustion – you can take them a long distance, and you have a lot of choices concerning your type of vehicle. Now you need to decide if you want a basic sedan, a sports car, a minivan, a pickup truck, or an SUV.
Refractors, the Sedans and Sports Cars

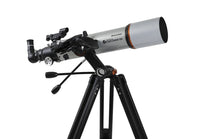
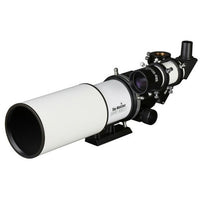
These are the "Galileo-type" telescopes that refract light through a series of glass lenses at the front end of the scope. Prices range from department store specials up to thousands of dollars for advanced and custom-made instruments. Refractors are good general-purpose telescopes for viewing the moon and bright neighbor planets like Jupiter and Saturn, as well as brighter deep-sky objects like the Orion Nebula and the Andromeda Galaxy.
One limitation common to refractors in the lower price bracket is Chromatic Aberration. You can think of this simply as color fringing of the object. This happens because the objective lenses at the front of the telescope don't refract (i.e., bend) the different frequencies of light (the rainbow of colors) exactly the same.
Just think of sunlight through a prism where you see a rainbow effect. The same applies to refracting light through the lenses of a telescope. This is going to be more pronounced with bright objects like the moon and planets, but not generally noticeable with dimmer stars. Some people find chromatic aberration objectionable; some think it's fun to see the colors. Either way, it is important to note that chromatic aberration does not affect how sharp and clear your view is.
The climbing prices in this category are primarily attributable to aperture (the diameter of the primary lens), and perfecting the optics to greatly reduce or eliminate the chromatic aberration. You can actually get refractors called apochromatics, or APOs, that have effectively no chromatic aberration at all and are excellent for wide-field astrophotography, but the prices for these scopes start at around $700 for just the telescope body itself - no mount/tripod.
Pros:
- Good general-purpose telescopes
- Wide field views
Cons:
- Above about 100mm, very high cost per inch of aperture
- Prone to chromatic aberration
Notes:
- Watch out for very poor optical quality with cheap scopes, referred to as "department store" telescopes
Newtonian Reflectors, the Mini-Vans

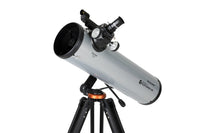
Newtonian telescopes use a large primary mirror instead of lenses to collect light. The mirror sits at the back of the scope, and reflects and focuses the light back up toward the top, where it reflects again off of an angled secondary mirror and out to the eyepiece on the side of the telescope body. The Hubble is a variation of a Newtonian reflector, as are most professional instruments today.
Cheaper, department store Newtonians may use an equatorial mount, which balances the weight of the telescope tube with a counterweight. This makes Newtonians a little more complex to operate for the beginner. These cheaper Newtonians typically also have compromised optics, called Bird-Jones.
Higher-end Newtonians on computerized equatorial mounts can make very good astrophotography scopes. Some models also have tabletop alt-azimuth stands, but this limits where you can use the telescope comfortably.
In the middle, there are Newtonians that are on alt-az mounts/tripods. This type is computerized - they use an app on your smartphone to guide you directly to the objects you want to see. These Newtonians are less expensive because you already have the computer in your pocket (your phone), and your arms are the motors.
Pros:
- Good general-purpose telescopes
- Wide field views
- No chromatic aberration (unlike refractors)
Cons:
- You need to align the mirror from time-to-time (called collimation)
- Not well suited to astrophotography, except for short-exposure lunar/planetary imaging.
- Watch out for very poor optical quality with cheap scopes, which are called Bird-Jones scopes
Dobsonians, the Pickup Trucks

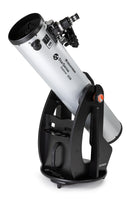
Affectionately referred to as light buckets, Dobsonians unquestionably give you the most bang for the buck for visual observing. These are basic, simple workhorse Newtonian telescopes. The name Dobsonian really just refers to the mount or base that the optical tube rides on. The design does away with the tripod and complex equatorial counterweight system and gives you straightforward left-right, up-down points of rotation. The simplicity of the design means these scopes are cheap to manufacture, easy to set up, and all-around great instruments for visual observing.
Just like Newtonians, there are also dobsonians that are computerized - they use an app on your smartphone to point you directly at the objects you want to see. These Dobsonians are less expensive because you already have the computer in your pocket, and your arms are the motors.
If you want to see deep-sky objects on a budget, this is the scope for you. An 8" Dobsonian can be had for around $800.
Pros:
- Best value per inch of aperture
- Excellent for visual observing of planets and deep-space objects
- Simple setup
Cons:
- You need to align the mirror from time-to-time (called collimation)
- Not well suited to astrophotography, except for short-exposure lunar/planetary imaging.
- Bulky tubes and bases can be awkward to transport and store.
Notes:
- Some Dobsonians come with an app you download to your phone to help you find objects. It's up to you to decide if this feature is worth the added cost (typically about $100-150). You can also find full "go-to" computerized Dobsonians that will find and track objects, but expect to pay a lot more.
Schmidt-Cassegrains, the SUVs
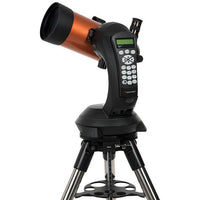
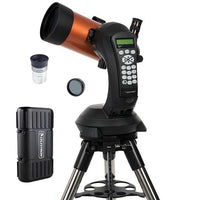
You can think of Schmidt-Cassegrain Telescopes (called SCTs) as combining some of the features of a Refractor and a Newtonian. While not technically accurate, I think of an SCT as a very short Newtonian with a large lens at the front and the objective pointing straight out the back, making it look like a short, fat refractor. SCTs are ideally suited for planetary observing and smaller deep-space objects. They are also a great scope for planetary photography.
The field of view is narrower than most refractors or Newtonians at about 1 degree or less, depending on the model. SCTs are the most compact and lightweight scopes at larger apertures, but they are notably more expensive than Newtonians.
Pros:
- Better value per inch of aperture than refractors above 100mm
- Great for planets and planetary astrophotography
- Smallest physical size for the largest aperture - very portable
Cons:
- More expensive than Newtonian/Dobsonian telescopes for the same aperture.
Notes:
- Generally narrower field of view than other types of scopes
Size vs. Portability
When shopping for your first telescope, once you’ve gotten past the cheap department store offerings (we'll get to those in a moment), it can be easy to get carried away with aperture fever. Aperture refers to the diameter of the primary lens or mirror of the telescope, measured in either millimeters or inches. The larger the aperture of the telescope, the more light-gathering power it has, which allows you to see fainter objects and more detail in brighter objects. To see dimmer Messier objects and distant galaxies, an 8” (200mm) aperture is about the minimum. So, to get the best views, you want the most aperture you can afford… except for when you don’t.
Larger aperture telescopes are, well, bigger and consequently heavier and bulkier. Before you pick a telescope, think carefully about where and how you will want to use your telescope, and where you’ll be storing it. The old adage is, The best telescope isthe oneyou use the most." If you live on a 7th floor apartment with no elevator, trying to move a large and heavy telescope will probably quickly start to seem like more trouble than it’s worth.
A telescope that lets you see the faintest of objects isn’t any good if you don’t want to use it. In this case, you’re much better off with a smaller telescope that’s easily portable. On the other hand, if you plan to keep your telescope in the garage and move it no further than the driveway to use, you can definitely consider a much larger scope.
Be mindful that many telescopes are actually physically larger in real life than you might think they are when looking at pictures online. If possible, it’s always a good idea to look at a telescope in person. Better yet, look through several at a local star party.
Ignore Magnification
Department store telescopes will often advertise magnifying power - something like "200x" or "400x." If you see a telescope advertising this, walk away. Magnifying power is a marketing gimmick for low-quality instruments. This is because you can put a "high power" eyepiece on basically any telescope and get a ridiculously high magnification power, but unless the telescope has a large enough aperture and quality optics to support that magnification, you won't be able to get a sharp image. That "high power" eyepiece itself is probably also going to be very optically poor.
A simple rule of thumb is the maximum useful magnification of a telescope is going to be the aperture in millimeters multiplied by 2. (If the aperture is listed in inches, multiply the aperture by 50). There is however an upper limit of about 200x - 250x. Even if you have a 12" aperture telescope, due to atmospheric conditions, the maximum useful magnification is about 200x - 250x, and that's on a good night with little air turbulence.
Side Note: Here on the Colorado Front Range, we are typically under the turbulence from the jet stream coming from the west over the Rockies. This limits effective magnification most nights to around 150x - 180x.
Astrophotography
If you want to explore astrophotography, there are a few additional considerations.
Cameras
If you don't already have a basic DSLR camera, my best advice here is that your first purchase should be an entry-level DSLR, and the telescope can come later. Even with a standard camera lens and a tripod, you can take wonderful photos of constellations and night sky landscapes, and the occasional bright comet.
Basic DSLRs, particularly models a year or two old, like the Canon EOS Rebel T5 start around $400-500, but you can find recent models used or refurbished as low as about $300. Specific models to consider would be the Canon Rebel series or the newer Nikon and Sony cameras. These and similar DSLR (interchangable lens) cameras can be easily connected to a telescope with inexpensive adapters that turn the telescope itself into a large telephoto lens.
Telescopes & Mounts
If you plan to take long-exposure photos (and if you want to photograph deep space objects, you need to) then you should seriously consider purchasing a telescope with a computerized German Equatorial Mount. GEMs, as they are often called, use a counterweight system to balance the telescope, with one axis adjusted to match your latitude. This somewhat increases the complexity of use and raises the entry price, but there are two good reasons to spend a bit more here.
First, a computerized GEM will track an object along a single axis as the earth rotates. This creates smoother tracking than an alt-az mount that has to constantly adjust both axes. Second, an equatorial (EQ) mount rotates the scope in sync with the sky as it tracks. Using an alt-az mount, you'll discover that two photos of the same object taken an hour apart will be rotated in the frames. You can correct for this in post-processing, but if you are serious about doing astrophotography with your telescope, an EQ mount is worth the extra cost and effort.
The best way to get started is actually with a camera tracker mount, particularly if you already have a DSLR camera. Camera trackers like the Sky-Watcher Star Adventurer are an economical way to get started with your existing camera gear.
Stepping up from camera trackers, the entry-level EQ mount is the Celestron Advanced VX (or AVX) or iOptron CEM26 or GEM28. Pair this with a nice 80mm APO refractor like the William Optics GT81 or the Sky-Watcher Esprit 80mm EDT, and you have a portable and excellent quality astrophotography setup. When starting out, stay away from the temptation to get a really big, really long focal length telescope. The complexity in getting a good photo increases quickly as you reach longer focal lengths, and an auto-guider setup becomes mandatory. More on that in a future article.
Final Thoughts
Ideally, you want to get a feel for different types of telescopes for yourself before you buy. Star parties are probably the best way to do this. Check out the Astronomical League to find an astronomy club near you. Almost every astronomy club hosts public star parties where you can have a chance to look through a number of different scopes and ask questions of other amateur astronomers.
Ready to start shopping? Check out our recommended Manual and Computerized telescopes, or our recommended Astrophotography gear.


